
The
Bark Canoe Store
Shop Address:
15 East Sinto
Spokane, WA 99202
Mailing Address:
1111 West 10th Avenue
Spokane, WA 99204
(509)327-7902
(office voice & fax)
(509)327-1850 (shop)
barkcanoe@earthlink.net
www.barkcanoe.com
John Lindman
proprietor/builder
Copyright (c) 2008
All Rights Reserved
IN THIS ISSUE
1. News
- Birchbark canoes in "Art of the West" Magazine
- Summer Wrap-up and What's Happening Now
- Fiberglass Replicas
- Christmas Goodies for Your Wish List
2. Tech Tip
- Teb Behne - Making Stem Pieces
Birchbark canoes in Art of the West Magazine

In the November and December issue there are a couple of nice paintings which include birchbark canoes. Most major booksellers such as Barnes and Noble or Borders have this magazine on their stands.
One of the pictures is a featured painting, as seen above, by John DeMott of a courier d'Bois hunting moose.

The other is an ad for Robert Griffing, who has done a number of fine paintings which include birchbark canoes, depicting eastern Natives in Old Algonquin canoes.

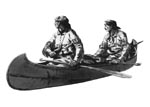
In the January/February issue of 2008 they featured the art of Joe Velazquez
Here is a nice piece with Ojibwe "jacklighting" for fish from birchbark canoes.From their web site you can view past issues. This is a great magazine if you like art that romances the west.
Summer Wrap-up and What's Happening Now
Busy summer.- Wrapped up (2) 28ft Chippewyan cargo canoe fiberglass replicas;
- Built a 26ft birchbark Chipewyan cargo canoe;
- Delivered them to Peace River, Alberta;
- Built a 14ft Ojiway Longnose birchbark canoe at Camp Chippewa on Cass Lake in northern Minnesota;
- Just finished a 16ft Ojibwe Longnose birchbark canoe at the shop;
- Did 3 fiberglass replicas (two with wood ribs and sheathing)
- And am now focusing on building fiberglass replicas using a new composite technique.
Fiberglass Replicas
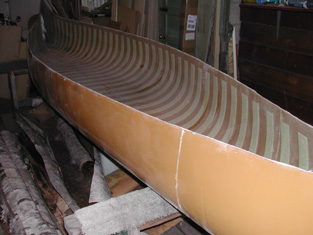
At present I am refitting my molds for infusion bagging, a fiberglass fabrication process that allows you lay out your material dry and infuse resin through a vacuum bag. This creates a much stronger and lighter product. This is the state of the art process for any type of glass work.We did a test with an 18" panel. We smashed it with a hammer, jumped on it with one side on a step - it just sprang back - and we finally tried to snap it with plyers. It just bent until we were at a 90 degree angle and finally it cracked but did not break away.
Did an 18' canoe with this lay-up and while it was heavy it is bulletproof. Then made some changes and did a 16' canoe. Wow! That sucker is light. My scale said it was 34 pounds without the gunwales and thwarts - which typically are 15 lbs so I figure these 16ft models to come in under 50 pounds. That shouldn't be too tough to portage. Moreover, using this technique the ribs really look real. See for yourself.
Another new development is that we are now doing large fur trade fiberglass replicas. Since doing the 28ft cargo canoes we moved into doing 2 lengths - the 26ft north canoe and the 34ft Montreal canoe. The 26ft model also comes in the Old Algonquin war canoe style. As soon as I have pictures I will share them with you.
Stocking Stuffers
I don't know about you but my wife says, "you better tell me what you want for Christmas or you might get something you don't want." I need to make a big list otherwise there is no surprise when I open my present. With that in mind (just in case you are like me) I will give a few things that might make your list-making easier.First we just got in a shipment of solid ash paddles. Very light, very tough.


As you can see we have them in both stained and unstained. They sell for $69.95. For $5 you can have the blade painted as shown. In either case they are oiled. We have a good selection in the common lengths.
Have you seen this book?

If you are not familiar with Philip Goodwin you have been missing out. He is one of the most prolific illustrators of birchbark canoes. Depicting scenes from the early 1900s Goodwin captures the spirit and feel of the northeastern lakes and woods of Canada in an authentic manner. This book is a treasure-trove of Goodwin prints with scores of full color prints of birchbark canoes in action. His work adorned magazine covers such as "Outdoors" and could be seen on tin signs for Winchester and Marlin Rifles. Recently Wenonah Canoes has used his art for their tin signs. This coffee table book is 388 pages with 550 images - hundreds in full color. This is a great book! Suggested retail price is $95, the Bark Canoe Store price is $75 plus shipping (it weighs a full 7 lbs). Philip R. Goodwin: America's Sporting and Wildlife Artist (Hardcover) by Larry Len Peterson.
You can get it from us or you can go to Amazon.com and get it cheaper. In either case, do yourself a favor and get it!
While you're at it here are some more you might enjoy.
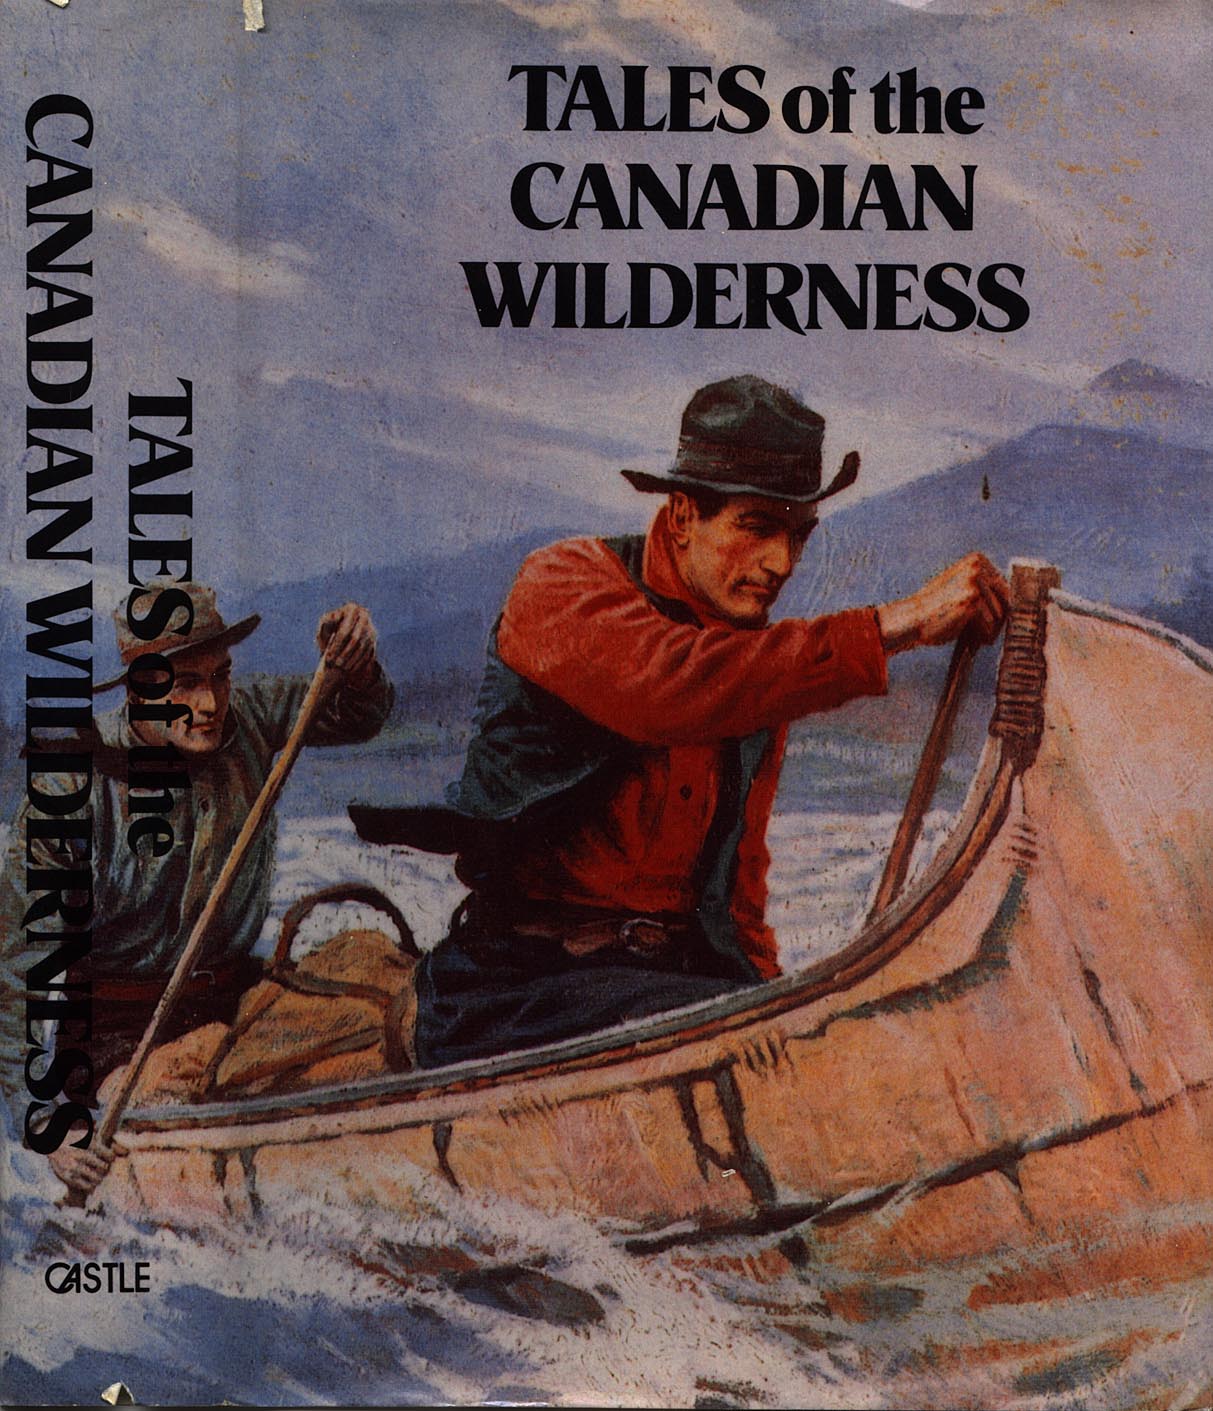
"Tales of the Canadian Wilderness" is a compilation of short stories and magazine articles from the early 1900s. They tell of exploration and the fur trade. Beautifully illustrated with lots of pictures of birchbark canoes. $12.

"Bark Canoes and Skin Boats of North America" is THE book on birchbark canoes and their building. If you don't have it and you have an interest in someday owning or building a birchbark canoe whether a miniature or full size, then this is your book. $32.95.

"Bark Canoes, The Obsession of Tappan Adney" is the counterpart to "Bark Canoes and Skin Boats". This coffee table style book is a collection of photos of Adney's scale miniature canoes - most of which are mentioned in the other book. Fun book. $35.
Tech Tip -
Building Tip - More on Miniatures by Ted Behne, Making Stems
This article continues the assembly process with the making of stems at each end of the canoe. Previous articles outlined other basic steps. To review previous articles, go to www.barkcanoe.com/home.htm. Then select “Tips,” then “Building Miniature Canoes.” Required tools for making stems: tape measure, razor knife, small piece of 1/4” plywood, box of 1 1/4” finishing nails, small hammer, small piece of sandpaper.Begin by making a xerox copy of the stem portion of the measured drawing. Prepare a piece of 1/4” plywood slightly larger than the xerox copy. Overlay the drawing onto the plywood and hammer nails into the outer edges of the stem drawing, at 1/2” intervals, to create a form to hold the hot-water-bent stems in place until they dry.
Measure the length of the stem on the drawing using a flexible tape measure. Prepare two stem blanks the required length (with an inch or so extra for final trimming,) the required width and approx. 3/16” thick. Bind one end of each blank, beginning at a point behind the headboard position, with sewing thread wound tightly and tied off to prevent the stem laminations from splitting to the end. Shape the inboard tip as indicated on the drawing, taking care to make the notch to hold the base of the headboard in place.
Lay the stem blanks flat. Measure and draw the centerlines with a straight edge and a sharp pencil. Then mark the center of the areas on each side of the centerline. Carefully cut through the stems on each of the lines you've made. Take your time. Be patient. You will find that the sharp pencil point has made a groove in the soft cedar that can be used as a guide for the first pass with the razor knife. Repeated shallow strokes along the same line are better than one deep cut. The result will be clean, straight edges with minimum risk of wandering or slippage that can ruin the stem blanks. The four new laminations will allow the stems to easily bend into the required shape, something solid stem blanks could never do without breaking.
One final step before bending. Hold the stem vertically so you can look at it from the top. Shape the top profile of the stem with sandpaper to look like the profile of a bullet, with a rounded edge at the front of the canoe and a flat edge facing inboard. Do this for the entire length of the stem, from the open tip to the thread-wound base, but not past the thread. Soak the stems in cold water for several hours.
Boil some water in a large pot. Dip the wet stems into the boiling water for 20-30 seconds. While still hot, quickly fit one stem into the nail form. Repeat for the second stem. The stems should exactly match the shape on the drawing except for an inch or so extra at the top, which will be trimmed off later. Let dry overnight, leaving space between the stems for air to circulate. Remove the stems from the form. They should hold the rough shape of the drawing. Wind thread in spiral loops around each stem to firmly hold the required shape. Make adjustments of thread tension or stem bend to achieve the right shape, then tie off the thread. Both stems should be exactly the same shape as the drawing. Double check and make adjustments if necessary.
In the next article, the stem pieces will be lashed in place. If you have questions about any of the above, just send an email to tedbehne@comcast.net.
You can view Ted's work here.
---------------------------------------------------------------------------
To remove yourself from this list, simply reply to this
email with the word "REMOVE" in the subject.
---------------------------------------------------------------------------